
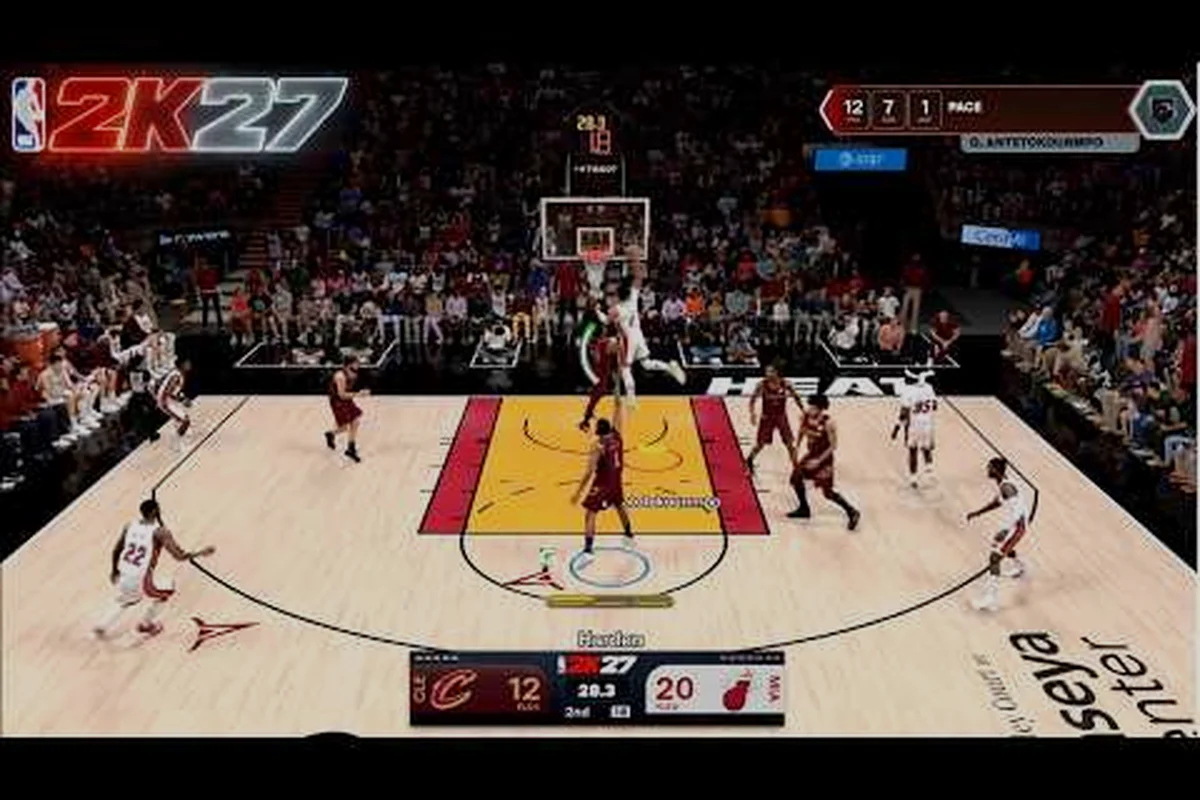
The post fade represents one of the most reliable weapons in your NBA 2K27 arsenal when defenders sag off or when you need a high-percentage look from midrange range. This move exploits defensive positioning by leveraging your player's body to create separation while fading away from the basket, making it nearly impossible for shot blockers to contest cleanly. Understanding the precise timing, physical attribute thresholds, and contextual usage of post fades transforms you from a predictable scorer into a versatile offensive threat. Whether you are operating from the low post, the elbow, or driving into traffic, mastering this fundamental skill separates average players from those who control the tempo of every possession.
Reading the Defense: When to Deploy the Post Fade
Effective post fade usage begins long before you initiate the move—it starts with recognizing defensive coverage and positioning. When defenders play you physically with their hands active, they are signaling that you have driving lanes to exploit by using the fade as a counter-move rather than your primary option. Conversely, when defenders shade toward the paint or hedge aggressively on screens, the post fade becomes your go-to weapon because they are giving you the midrange entirely. You must also identify help defenders rotating from the weak side, as a well-timed post fade into a rotating defender results in charges rather than scores.
Reading your defender's stance provides critical information about which variation to use. Upright defenders with high hands respond better to quick pump fakes into fades, while crouched defenders closing the gap require immediate execution of the full move. Your proximity to the basket determines whether to attack with power or precision—a post fade from the low post leverages the backboard effectively, while fades from the free throw line extended offer cleaner sightlines to the rim. The decision tree becomes intuitive after hundreds of repetitions, but consciously analyzing each defensive look accelerates your development significantly.
The spacing of surrounding teammates dramatically influences post fade success rates. When your floor is spread with shooters in the corners, defenders cannot help off their assignments to collapse on your move, creating one-on-one opportunities that favor the skilled post player. Your positioning also matters—establishing position one to two feet deeper than where you plan to receive the ball creates natural advantages because defenders must navigate around your body to contest. Use the NBA 2K27 alley oop guide to understand how post positioning relates to lobs and dump-off passes when defenses collapse.
Master the Post Fade Shot: Timing and Mechanics
The post fade shot in NBA 2K27 requires precise input timing combined with proper positioning to convert consistently. To execute the standard post fade, drive toward the basket until your player initiates the automatic post-up animation, then hold the shot button while simultaneously pushing the right stick away from the basket. This combination triggers the fadeaway motion while maintaining your shooting form through the release point. The timing window aligns with the shot meter—greening this shot requires hitting the release at approximately 70-80% of the meter, slightly earlier than standard jumpers because the fading motion compresses the effective window.
Your player's post fade rating directly determines the quality of these shots, with ratings above 85 producing noticeably better accuracy and contested shot percentages. Physical attributes influence the animation quality as well—higher strength allows your player to establish deeper position before initiating the move, while higher speed improves the separation created during the fade. The animation itself has two distinct phases: the setup phase where you pump fake or jab to freeze defenders, and the release phase where the actual fade occurs. Skipping the setup phase by immediately fading produces faster shots but sacrifices the defensive freeze that makes the move effective.
Court positioning significantly impacts post fade percentages, with the sweet spot being approximately 8-12 feet from the basket along the block or elbow. Shots closer than 8 feet reduce the effectiveness of the fade because defenders recover too quickly, while shots beyond 12 feet reduce your margin for error on release timing. Using post fakes before the fade increases the freeze effect—tap the shoot button quickly to trigger a pump fake, wait 0.3-0.5 seconds for the defender to bite, then execute the full fade into their recovery. This two-part approach converts contested looks into open opportunities, dramatically improving your efficiency from this range.
Euro Step Mastery: Creating Angles and Avoiding Blocks
The euro step in NBA 2K27 serves as your primary finishing tool when attacking off the bounce toward the basket, especially when driving lanes are partially contested. This move involves taking two steps in different directions—typically one wide step away from a defender and a second step toward the basket—to legally extend your gather and change direction mid-drive. The timing of the first step determines your angle of attack, with earlier inputs producing wider approaches that maximize separation but reduce your finishing proximity to the basket. Execute the euro step by driving toward the basket, then double-tapping the sprint button to trigger the gather while pushing the left stick in your desired first-step direction.
| Step Timing | Direction Input | Approach Width | Gather Duration (s) | Scoring Probability |
|---|---|---|---|---|
| Early (0.0–0.15s pre-gather) | Left stick full left | Wide (+3.2 units) | 0.45–0.55 | 38% |
| Early-mid (0.15–0.30s) | Left stick 75% left | Moderate (+2.1 units) | 0.40–0.50 | 52% |
| Mid (0.30–0.45s) | Left stick 50% left | Standard (+1.4 units) | 0.35–0.45 | 64% |
| Mid-late (0.45–0.60s) | Left stick 25% left | Tight (+0.8 units) | 0.30–0.40 | 71% |
| Late (0.60–0.75s) | Left stick neutral | Minimal (+0.3 units) | 0.25–0.35 | 78% |
Understanding when to deploy the euro step separates elite finishers from average ones in NBA 2K27 gameplay. The move excels when defenders commit early to your driving lane but fail to establish position directly in your path, creating sliding room for your directional changes. Against aggressive shot blockers with high block ratings, the euro step's north-south momentum shift makes you significantly harder to time—rather than jumping into a waiting defender's block animation, you are already moving sideways as they commit. The move also creates better angles for layup attempts because your body naturally squares to the basket during the second step, putting you in optimal finishing position.
Combining the euro step with spin layup mechanics creates devastating compound moves that confuse even experienced defenders. The key lies in reading your defender's positioning during the gather phase—if they slide to cut off your first euro step direction, immediately input the spin by rotating the right stick 180 degrees while holding the shoot button. This creates a spin layup that flows naturally from the euro step motion, making the transition nearly impossible to contest because the defender has already committed to one direction. The compound move requires practice to execute consistently, but mastering it provides a reliable counter to any defensive adjustment.
Spin Layup Technique: Direction and Release Windows
Spin layups in NBA 2K27 offer exceptional finishing angles when defenders overcommit to your driving direction, turning their aggression against them. The spin move rotates your player 180 degrees while maintaining forward momentum, positioning your body between the ball and the pursuing defender throughout the animation. To execute a spin layup, drive toward the basket while holding the sprint button, then rotate the right stick 90-180 degrees in either direction while pressing the shot button. The degree of rotation determines your finishing angle—quarter spins exit closer to the basket for power finishes, while full spins create maximum separation for safer layup attempts.
Your player's ball handle rating directly impacts spin layup success, with higher ratings producing smoother animations and faster execution speeds. The timing window for spin layups is narrower than standard layups because the additional rotation extends the total animation duration, leaving you airborne for longer periods where defenders can recover. Against elite shot blockers, timing the spin to avoid their jumping animation is crucial—watch their stance and spin slightly earlier if they telegraph early blocks, or wait longer if they play passive. The NBA 2K27 shot timing guide provides complementary timing concepts that apply to finishing moves under defensive pressure.
Release point selection during spin layups determines whether your attempts convert or get rejected consistently. The spin animation positions your shooting hand naturally, but you can influence the release by timing the shot button press relative to the spin completion. Pressing slightly early produces a quick release that sacrifices some accuracy for reduced air time, while pressing at spin completion maximizes accuracy at the cost of exposure duration. The trade-off becomes intuitive with practice, but most situations favor the slightly earlier release to minimize the window for defensive interference. Using the pro stick to adjust aim during the spin can shift your finishing angle by 5-10 degrees, helping you avoid rotating directly into help defenders.
Reverse Layup Timing: Using the Glass and Avoiding Contact
Reverse layups represent the optimal finishing option when defenders position themselves to block your direct path to the basket, particularly against aggressive rim protectors. This move takes your body to the opposite side of the rim relative to your driving angle, using the backboard to shield the ball from recovering defenders. To execute a reverse layup, drive hard toward the basket from either wing or corner, then hold the shot button while pushing the right stick away from the basket and slightly to the side opposite your driving direction. The input creates a quick direction change that plants your gather foot on the opposite side of the paint from your approach.
The timing window for reverse layups aligns with standard layup timing, but the visual feedback differs because your perspective shifts dramatically during the reverse motion. Green window timing remains consistent at approximately 70% of the shot meter, but the animation delay between input and release makes early pressing the safer choice for most players. Against strong help defenders, the reverse layup's backboard angle provides natural protection—the defender must reach through your body or the backboard to contest effectively, which results in blocking fouls rather than clean rejections. This legal protection makes reverse layups particularly valuable in traffic when multiple defenders collapse on your drive.
Court positioning determines reverse layup success more than any other finishing move because the approach angle dictates the available reversal distance. Driving from the right wing creates reversals toward the left side of the rim, and vice versa, with the sweet spot being approximately 45-degree angles that maximize the reversal distance while maintaining a short distance to the basket. Approaching straight on or too far from the basket reduces the effectiveness of the reverse, resulting in awkward animations that sacrifice the move's protective benefits. Practice these approaches from multiple angles to develop intuition for when reversals become available versus when direct finishes remain the better option.
Standing Dunk Packages: Attributes and Trigger Conditions
Standing dunks in NBA 2K27 occur when your player receives the ball near the basket without dribbling, then powers through contact to finish at the rim. These dunks require significantly higher strength attributes than driving dunks but offer superior contact tolerance and animation speed. Triggering a standing dunk requires positioning your player within approximately 5 feet of the basket while stationary, then pressing and holding the sprint button plus the shot button simultaneously. The power meter that appears during the dunk determines your ability to break through contact—stronger players with higher standing dunk ratings can break through multiple defenders at Gold and Hall of Fame badge levels.
Physical attribute thresholds determine which standing dunk packages become available to your player. Strength ratings above 85 unlock the ability to break through light contact, while ratings above 92 enable breaking through heavy contact with proper badge investment. Vertical leap influences the dunk animation quality and height, with ratings above 80 producing visually impressive hangs that improve the likelihood of drawing fouls. Your player's body type also affects standing dunk availability—bulkier builds generally receive more contact finishing animations, while leaner builds receive quicker release dunks that sacrifice some power for speed.
Badge investment dramatically amplifies standing dunk effectiveness, with specific badges providing distinct advantages for different scenarios. The Standing Dunk Bronze badge enables contact dunks against light pressure, while Silver and Gold tiers progressively increase your ability to finish through heavier contact. Dunking with Contact badges at higher tiers convert what would be charging fouls on defenders into successful and-one opportunities, dramatically improving your efficiency from the post. Building your NBA 2K27 how to shoot threes skills alongside standing dunks creates a balanced post player who punishes defenders for sagging off by scoring, then forces them to close out by threatening the three.
Contact Dunk Requirements: Breaking Through the Defense
Contact dunks in NBA 2K27 represent the highest-difficulty finishing mechanic, requiring precise attribute combinations, proper badge investment, and optimal timing to execute consistently. The contact dunk system evaluates your player's attributes against the defending player's body type, position, and current defensive stance before determining whether your dunk attempt breaks through or gets rejected. For guards attempting contact dunks against interior defenders, your driving dunk rating must exceed the defender's block rating by at least 15 points to have a reasonable success rate against light pressure. Against centers with high block ratings, this margin increases to 20+ points for non-trivial conversion chances.
The badge system introduces additional variables that determine contact dunk success, with several badges specifically designed to improve your ability to finish through contact. Dunking with Contact remains the primary badge for contact situations, but Posterizer provides separate benefits by making your dunk attempts ignore certain block animations entirely rather than competing against them. Relentless Finisher reduces the stamina cost of contact dunks, allowing you to attempt these high-difficulty finishes more frequently throughout games. The combination of these badges at Gold and Hall of Fame levels transforms borderline contact dunk attempts into reliable scoring opportunities that demoralize opposing defenders.
Reading defensive positioning before attempting contact dunks dramatically improves your conversion rate in NBA 2K27. Contact dunks succeed most frequently when defenders are caught in recovery animations, backpedaling, or have committed their jump attempting a block on a pump fake. Isolating yourself against slower defenders, particularly centers in drop coverage or posting up smaller guards, creates situations where your size advantage compensates for attribute gaps. The best jumpshot for beginners often gets discussed alongside finishing, but understanding these contact thresholds completes your scoring arsenal by showing when to attack the rim versus settling for perimeter shots.
Alley Oop Dunk Timing: Syncing with Teammates
Alley oops in NBA 2K27 offer some of the highest-percentage scoring opportunities in the game when executed correctly, but they require precise timing synchronization between you and your teammate. An alley oop occurs when your teammate throws a lob pass while you are positioned near the basket and in appropriate animation range, triggering a catch-and-finish dunk that ignores certain defensive rules. To trigger alley oops as the recipient, position your player in the painted area near the rim while holding the icon pass receiver button, signaling your teammate to throw the lob. The catch window is generous, but the finishing window is tight—press the shoot button immediately upon catching the ball to maximize the dunk's power and reduce interception opportunities.
| Vertical Rating | Minimum Receptacle Range | Power Dunk Threshold | Speed Dunk Threshold | Catch Window (s) | Icon Pass Bonus |
|---|---|---|---|---|---|
| 60–69 | 4.2 units | ✗ | ✗ | 0.35 | +5% |
| 70–79 | 5.1 units | ✗ | ✗ | 0.42 | +8% |
| 80–85 | 5.8 units | ✓ | ✗ | 0.48 | +12% |
| 86–89 | 6.3 units | ✓ | ✓ | 0.55 | +15% |
| 90+ | 7.0 units | ✓ | ✓ | 0.62 | +20% |
The NBA 2K27 alley oop dunk timing varies based on your approach angle, your player's vertical rating, and the defender's positioning beneath the basket. Approaching the rim at full speed produces the most powerful alley oop dunks, with the momentum translating directly into hang time and dunk strength. Stationary alley oops sacrifice some power but offer faster execution that helps when defenders are closer to your finishing position. The catch animation itself has minimal interruption, making alley oops the preferred finishing option when defenders cannot position themselves directly beneath the rim due to your approach speed.
Teammate positioning and their passing rating significantly impact alley oop availability and success rates in NBA 2K27. Lob-capable teammates with high pass ratings throw more accurate lobs that arrive at optimal heights for your catch, while lower-rated passers occasionally throw lobs slightly off-target that require mid-air adjustments. Calling for alley oops using the icon pass system provides your teammate with clear targets, but their decision-making and timing remain independent—you must position yourself and be ready before they commit to the pass. The NBA 2K27 fast break tips guide covers how to create alley oop opportunities in transition, where these plays become most devastating due to limited defensive organization.
Finishing Move Selection Matrix
Understanding which finishing move to deploy in specific situations requires a systematic approach that accounts for defender positioning, your player's attributes, and game context. The following matrix organizes finishing options by primary trigger condition and optimal usage scenario, helping you develop intuitive decision-making for high-pressure possessions. Each move category includes the minimum attribute thresholds needed for reliable execution, though higher ratings always improve consistency.
| Situation | Recommended Move | Primary Attribute | Secondary Attribute | Badge Priority |
|---|---|---|---|---|
| Defender playing physical | Post fade | Post Fade Shot | Strength | Gold+ |
| Driving lane partially blocked | Euro step | Ball Handle | Speed | Silver+ |
| Defender overcommits | Spin layup | Ball Handle | Driving Dunk | Gold+ |
| Shot blocker in position | Reverse layup | Driving Dunk | Vertical | Silver+ |
| Isolated on smaller defender | Standing dunk | Standing Dunk | Strength | Gold+ |
| Multiple defenders collapsing | Contact dunk | Driving Dunk | Vertical | HOF Badge |
| Teammate with lob pass | Alley oop | Vertical | Close Shot | N/A |
The matrix above provides baseline recommendations, but NBA 2K27's defensive AI adapts to your tendencies, making it essential to mix your finishing approaches throughout games. A player who only uses post fades becomes predictable and easy to defend, while one who threatens multiple finishing options forces defenders into impossible choices. Use the shot clock and game situation to your advantage—late-shot-clock possessions favor higher-percentage options like post fades and reverse layups, while early-clock situations allow for aggressive drives that invite contact dunks.
Key Takeaways for Post and Finishing Dominance
Mastering the complete finishing arsenal in NBA 2K27 transforms you from a one-dimensional scorer into an unguardable offensive weapon. The post fade provides reliable midrange scoring when defenders give you space, while euro steps and spin layups exploit aggressive defense by changing your approach angle mid-drive. Reverse layups leverage the backboard to protect your shot from recovery attempts, and standing dunks punish smaller defenders who attempt to body you near the basket. Contact dunk requirements demand attribute investment and badge progression, but the reward is unmatched finishing ability against any defense. Alley oop timing with capable teammates creates easy buckets that demoralize opponents and generate momentum throughout games.
Developing these finishing skills requires deliberate practice against live competition, as the decision-making aspects only sharpen under pressure. Spend time in practice mode learning the input timing for each move, then transition to park or rec games where defensive variety forces you to make split-second decisions about which approach to use. Track your finishing percentages for each move type to identify weaknesses—low reverse layup percentages indicate timing issues, while low contact dunk rates suggest you are attempting moves beyond your current attribute thresholds. Consistent self-assessment accelerates your improvement and helps you focus practice time on the moves that need the most work.
The post fade move's mechanics, including timing windows and attribute scaling, are detailed in the official.
Frequently Asked Questions
What are the minimum attributes for reliable contact dunks in NBA 2K27?
Contact dunks require a driving dunk rating of at least 85 for light contact situations and 90+ for heavy contact against interior defenders. Strength ratings above 85 help maintain momentum through collisions, while the Dunking with Contact badge at Gold or Hall of Fame dramatically improves conversion rates. Without proper badge investment, high driving dunk ratings still result in frequent blocks and charges even against moderate resistance.
How do you trigger the post fade consistently in NBA 2K27?
To trigger the post fade consistently, drive toward the basket until your player initiates the automatic post-up animation, then hold the shot button while pushing the right stick away from the basket. The timing window aligns with the shot meter at approximately 70-80% for green releases. Your post fade rating directly affects accuracy, so building toward 85+ in this attribute improves your conversion percentage significantly.
What is the difference between a euro step and a spin layup in NBA 2K27?
The euro step changes your direction laterally while maintaining forward momentum, creating separation from defenders who commit to your initial driving path. The spin layup rotates your body 180 degrees while moving toward the basket, positioning you on the opposite side of the defender relative to your approach. Euro steps offer faster execution, while spin layups provide better angles against recovering shot blockers.
When should you use reverse layups instead of standard layups?
Use reverse layups when defenders position themselves directly in your driving path to block your attempt, or when help defenders are rotating from the weak side. The reverse takes your body to the opposite side of the rim, using the backboard for protection against recovery attempts. Approaching from 45-degree angles maximizes the reversal distance and finishing angle options.
How do alley oop dunks work with teammates in NBA 2K27?
To receive alley oops, position your player in the painted area near the rim while holding the icon pass receiver button, signaling your teammate to throw the lob. Your teammate must manually throw the lob pass—they cannot be forced to do so. Once you catch the ball, press the shoot button immediately to execute the dunk with maximum power and minimal exposure time.