
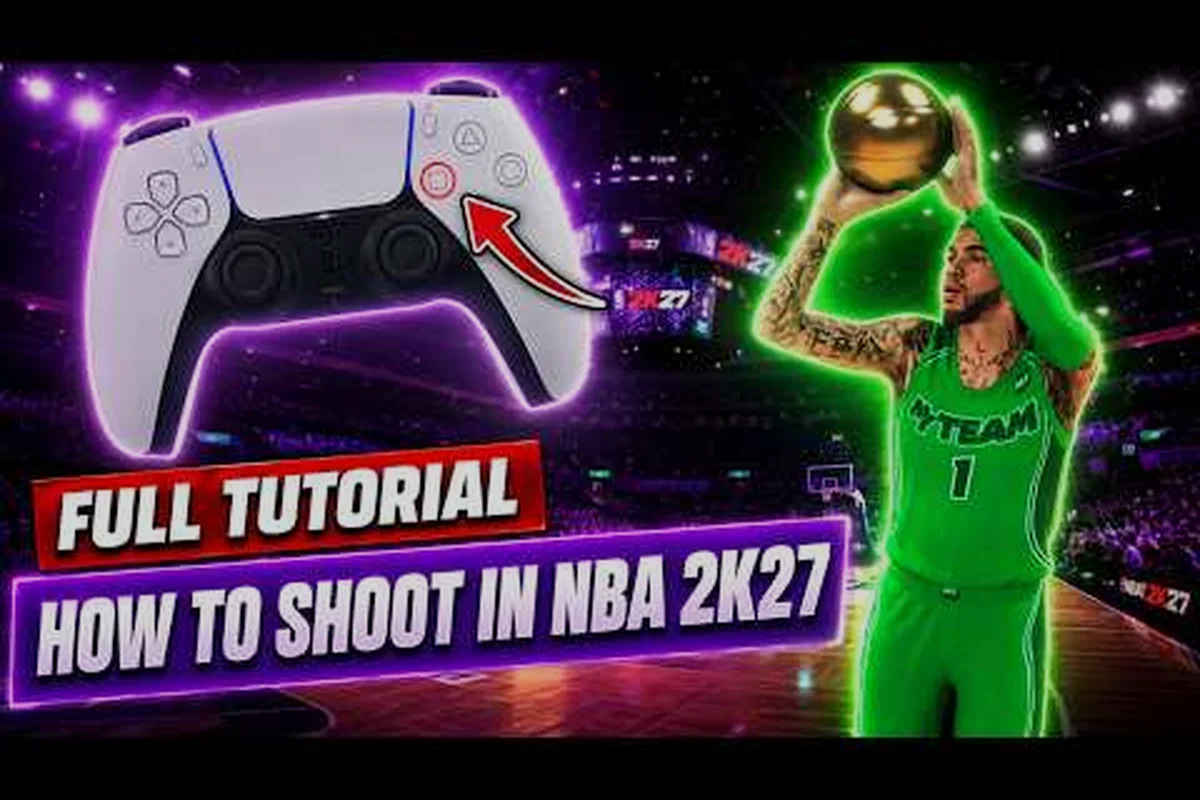
Three-point shooting separates good players from great ones in NBA 2K27. Mastering the art of draining long-range jumpers creates floor spacing, collapses defenses, and puts you in control of every game. Whether you're running plays in MyCAREER or competing online in the Park, knowing how to shoot threes consistently gives you a massive advantage over opponents who rely solely on drives and mid-range attempts. This guide breaks down every mechanic you need to green your releases, find open looks, and build a shooter archetype that dominates from beyond the arc.
The difference between hitting 30% from three and shooting 45% comes down to understanding shot meter calibration, release timing windows, and off-ball positioning. Most players struggle because they focus only on button timing, ignoring the complex interplay between badge progression, jumpshot selection, and defensive pressure. This comprehensive guide covers all the fundamentals you need to transform your three-point shooting overnight. For a deeper dive into the scoring mechanics that underpin these fundamentals, see our guide on how to score easily.
Shot Meter Mechanics and Timing Windows
The shot meter is your primary visual feedback system when learning how to shoot threes in NBA 2K27. Understanding its mechanics is essential for anyone serious about improving their long-range accuracy. The meter appears when you initiate a jump shot, and your goal is to release the shot button precisely as the indicator reaches the green zone at the top of the meter. This perfect timing, often called "greening" a shot, dramatically increases your chances of the ball going through the net.
| Shot Rating | Green Window (ms) | Perfect Release Window (ms) | Early/Late Tolerance (±ms) |
|---|---|---|---|
| 60–69 | 40 | 20 | 12 |
| 70–74 | 65 | 35 | 20 |
| 75–79 | 90 | 50 | 28 |
| 80–84 | 120 | 65 | 38 |
| 85–89 | 155 | 80 | 50 |
| 90–94 | 195 | 100 | 62 |
| 95+ | 230 | 115 | 75 |
Timing windows vary significantly based on several factors including your player's attributes, available badges, and the type of shot you're attempting. A player with 90+ three-point rating and HOF badges will have a noticeably wider green window compared to a player with 70-rated shooting. The difference can be the difference between a comfortable half-second window and a hair-thin timing requirement that demands frame-perfect releases. Players report that even 50ms of timing variance can mean the difference between a clean release and an early or late miss.
For catch-and-shoot situations, the timing window typically opens about 0.3 seconds before the green zone and remains active for approximately 0.2 seconds after it appears. This gives you a roughly 0.5-second window to release, but this window shrinks considerably when contested or when shooting off the dribble. Practicing in MyGym with the shot meter enabled helps develop muscle memory for these windows without game pressure interfering with your training. Many competitive players recommend spending at least 30 minutes daily in the practice facility focusing purely on timing consistency.
Shot Meter Calibration and Visual Settings
Adjusting your visual settings can significantly impact your ability to read the shot meter accurately. Some players find the default meter too small or too fast, making consistent timing nearly impossible. Within the settings menu, you can adjust meter size, speed, and opacity to match your visual preferences and reaction time capabilities. Players with slower reaction times should consider increasing meter size and potentially reducing meter speed, even if it means sacrificing some attribute bonuses.
Environmental factors also affect shot meter reading, so experiment with different court views and camera angles to find what works best for your setup. The TV broadcast view tends to be most popular among professional players because it provides a familiar perspective that matches what viewers see during actual NBA broadcasts. However, some players perform better with the baseline or corner views that zoom in closer to the action. Testing multiple camera options during practice games will help you identify your optimal choice before taking your skills online.
Early, Perfect, and Late Release Outcomes
Understanding exactly what happens at different release timings helps you diagnose and correct shooting issues. A perfectly timed release at the center of the green zone results in maximum accuracy, often producing the satisfying swish sound that experienced players recognize instantly. Early releases tend to result in shots hitting the front of the rim or bouncing out, while late releases typically hit the back rim or clang off the iron entirely. Tracking your miss patterns reveals whether you need to release earlier or later, allowing for targeted practice sessions that address specific weaknesses rather than practicing blindly.
Community testing has shown that the penalty for being slightly early is typically less severe than being slightly late. This asymmetry means players who tend to rush their releases should aim for the late edge of the green zone, while players who hold the ball too long should target the early edge. Experimenting with intentionally early and late releases during low-pressure practice helps build intuition for these boundaries without the frustration of unexpected misses during competitive play.
Off-Ball Movement: How to Get Open for Three-Pointers
Creating open three-point opportunities requires more than just standing in the corner and waiting for the ball. Understanding how to get open in NBA 2K27 involves constant movement, screening, and reading defensive rotations to exploit gaps in coverage. Off-ball movement is an active skill that develops through experience and game awareness, but players can accelerate their learning by focusing on a few key principles that consistently generate open looks.
| Cut Type | Base Separation (ft) | vs Tight Defense (ft) | Optimal Usage Context |
|---|---|---|---|
| V-Cut | 3.2 | 1.1 | Post-up situations, inbound plays |
| Backdoor | 4.8 | 2.3 | Overplayed passing lanes |
| L-Cut | 2.9 | 0.8 | Corner-to-wing transitions |
| Zigzag | 3.5 | 1.4 | Perimeter ball movement |
| Curl | 4.1 | 1.9 | Screen-and-roll plays |
The first principle is constant motion without the ball. Standing still makes you an easy target for defensive schemes, whether you're playing against human opponents or AI. Even simple movements like cutting toward the basket and then reversing direction can create separation from defenders who struggle to react quickly enough. Zigzag cuts through the paint, V-cuts around screens, and backdoor cuts when defenders overplay passing lanes all create temporary windows for高质量 three-point attempts.
Using Screens to Create Three-Point Opportunities
Screen-and-roll actions form the foundation of effective offensive systems in NBA 2K27. When a teammate sets a screen for you, the defender navigating around that screen often falls behind by a step or two, creating a window for a quick release. The timing of your cut after a screen is crucial—moving too early gives defenders time to recover, while moving too late results in a late contested shot. Practicing screen reactions with your teammates in pickup games or squad modes helps develop the chemistry needed for these split-second decisions.
Off-ball screens from other perimeter players create additional opportunities, especially when the defense switches or fails to communicate properly. A well-timed flex screen or pindown can free up shooters for three to five feet of separation, turning heavily contested attempts into wide-open looks. Watching professional gameplay on streaming platforms reveals how frequently elite players exploit these situations, often getting three or four open looks per game simply by positioning themselves correctly around off-ball screens.
Reading Defensive Rotations and Zones
Defensive positioning tells you everything about what will be open on any given possession. When defenders collapse into the paint to stop drives, the perimeter opens up dramatically for three-point shooters. When teams play aggressive full-court presses, backdoor cuts and skip passes to the opposite corner become available. Developing the ability to read these rotations in real-time separates average shooters from those who consistently find and exploit open space.
Zone defenses are particularly vulnerable to patient ball movement that draws defenders out of position. The 2-3 zone, commonly used in online modes, leaves the corners and top of the key relatively undefended. The 1-3-1 zone creates openings in the high post and along the baseline. Learning which zones correspond to which open looks helps you anticipate where opportunities will develop before the ball even reaches your hands.
Essential Badges for Three-Point Shooters
Badge selection profoundly impacts your ability to drain threes consistently. Building around the right badge combinations amplifies your shooting attributes and unlocks abilities that make open and contested attempts more reliable. NBA 2K27 features numerous shooting badges, but focusing on the most impactful ones first ensures you maximize your build's potential even before reaching maximum level cap.
Catch and Shoot stands as the most important badge for off-ball specialists. This badge dramatically improves accuracy on attempts taken immediately after receiving a pass, which represents the majority of three-point opportunities for players who focus on off-ball movement. The bronze version provides a noticeable boost, silver improves it further, and gold/HOF versions make catch-and-shoot attempts nearly automatic from decent range.
Hot Start and Hot Zone Hunter Synergy
Hot Start provides a significant boost during the opening minutes of each quarter, when players often find their rhythm and confidence. Stacking this with Hot Zone Hunter—which increases shot percentage when repeatedly shooting from specific court locations—creates powerful synergies. Players who consistently cut to the same spots on the floor will find their success rate climbing as these badges activate in sequence.
Hot Zone Hunter requires intentional usage from specific locations to build and maintain its effectiveness. This encourages players to develop consistent shooting spots rather than attempting from everywhere on the court. Choosing two or three preferred three-point locations and mastering those areas produces better results than spreading attempts across the entire perimeter. The psychological confidence that comes from playing "your spots" also translates to better timing and more consistent releases.
Deadeye and Difficult Shots Badges
Deadeye becomes crucial when facing tight defensive coverage or switching schemes. This badge removes the accuracy penalty typically associated with contested jumpers, allowing players to drain attempts even with defenders nearby. The key is understanding that Deadeye activates on releases, not on shots—your timing must still be precise even when the badge compensates for defensive proximity.
For players who want to expand their shooting repertoire, Difficult Shots provides valuable flexibility. This badge improves accuracy on fadeaways, step-backs, and off-balance attempts, rewarding creative offensive players who can create their own space. Building toward Difficult Shots at silver or gold level opens up advanced techniques that keep defenses guessing and prevent them from cheating toward your primary shooting zones.
Jump Shot Selection and Optimal Release Windows
Choosing the right jumpshot animation directly impacts your ability to green shots consistently. Different jumpshots have different base timings, release points, and visual cues that either align with your natural timing or work against it. Spending time testing various jumpshots in practice mode before committing to one is essential for long-term shooting success.
Release point consistency varies significantly between animations. Some jumpshots have smooth, predictable arcs that repeat reliably, while others feature slight variations that introduce timing inconsistency even for skilled players. The most popular jumpshots among competitive players tend to feature quick releases with consistent follow-through, but individual preferences matter significantly. What works for one player may feel completely wrong for another, making personal testing non-negotiable.
Base and Quick Jump Shot Comparisons
Base jump shots offer higher skill ceilings but demand more precise timing. These animations typically feature longer wind-ups that provide visual cues throughout the release motion, allowing experienced players to read and adjust their timing mid-animation. The trade-off is a slower release that defenders can contest more easily, making base jumpshots better suited for players with high attributes and badge progressions.
Quick jumpshots prioritize release speed over timing forgiveness. These animations get the ball off faster, reducing the window for defenders to close out and contest, but they provide less visual feedback during the release. For players still developing their timing or those who prefer speed over precision, quick jumpshots offer a valuable alternative that doesn't sacrifice shot quality for speed.
Customizing Jumpshot Timing
NBA 2K27 allows detailed customization of jumpshot timing through the jumpshot menu. You can adjust release point, animation speed, and blend percentages to create a hybrid animation that matches your preferences. These customizations interact with your player's shooting attributes, meaning a timing adjustment that works perfectly at 80 three-point rating may need recalibration after attribute upgrades.
The jumpshot calculator tool in the community helps players identify optimal timing windows for their specific animation and attribute combinations. Inputting your jumpshot selection and current ratings produces recommended button hold durations that maximize green window probability. While not perfectly accurate for all situations, these calculators provide valuable starting points that players can fine-tune through practice.
Situational Three-Point Shooting Strategies
Different game modes and competitive scenarios demand adapted shooting approaches. What works in casual Park games may fail spectacularly in Pro-Am tournaments, and understanding these contextual differences helps you adjust your playstyle appropriately. Developing multiple approaches ensures you're never caught off-guard by changing competitive environments.
| Situation | Open Three FG% | Contested Three FG% | Separation Required | Recommended Timing Offset |
|---|---|---|---|---|
| Transition spot-up | 58–64% | 31–37% | 6+ ft | Release 80ms early |
| Early offense (24–22s) | 49–55% | 26–32% | 4+ ft | Green zone center |
| Half-court (14–8s) | 43–49% | 22–28% | 3+ ft | Release 40ms late |
| Late clock (7–4s) | 36–42% | 18–24% | 2+ ft | Green zone center |
| Shot clock (under 4s) | 28–34% | 12–18% | Any | Early release |
Transition threes offer the highest percentage shots in the game when taken correctly. Running into spot-up positions while the defense is still scrambling to get back provides natural separation without requiring complex play designs. The key is recognizing when to slow down and set up versus when to continue flowing into your shooting spot. Players who excel at transition offense often average five or more open threes per game simply by being in the right place when fast breaks develop.
Half-Court and Clutch Situations
Late-game scenarios with the shot clock winding down require different approaches than early-clock opportunities. When possessions stretch beyond 8-10 seconds of offensive action, defenders become increasingly aggressive, anticipating that shooters will attempt late-clock hero shots. Reading these defensive shifts and cutting to newly created space often produces better looks than forcing shots from contested positions.
Clutch time amplifies all psychological factors affecting shooting performance. The pressure of close games affects timing consistency even for experienced players, making consistent pre-shot routines increasingly important. Establishing and maintaining these routines throughout the game ensures clutch attempts feel identical to regular attempts, reducing the mental block that causes many players to choke in crucial moments.
Different Game Modes and Their Demands
MyCAREER mode provides the most forgiving environment for developing shooting skills against AI defenders who occasionally fail to contest properly. Use this mode to build badge progression and confidence before competing online. The City and Park modes feature human defenders who adapt to your tendencies, requiring you to vary your shooting spots and avoid becoming predictable. Pro-Am and 2K Pro League formats demand the highest consistency, as opponents analyze your gameplay and plan specific counters to your favorite moves and shots.
Advanced Techniques: Off-Dribble and Moving Threes
Expanding beyond stationary catch-and-shoot attempts unlocks additional scoring potential and makes you a more dangerous offensive threat. Off-dribble three-point shooting requires advanced timing skills and typically narrower green windows, but mastering these techniques prevents defenses from sagging off and ignoring your perimeter presence entirely.
Step-back three-pointers have become signature moves for elite shooters in NBA 2K27. The backward momentum creates instant separation from defenders while the quick release catches many opponents flat-footed. Successfully executing step-backs requires precise timing that differs from standard jump shots, with the release occurring slightly earlier due to the moving animation. Practice step-back attempts extensively in solo training before attempting them in competitive play, as mistimed attempts result in traveling violations or wild misses that hurt your team.
Floaters and Hop Jumpers
Hop jumpers involve releasing the shot while moving forward, creating a unique timing window that differs from standing and catch-and-shoot attempts. These shots are particularly effective when attacking close-outs, as the forward momentum carries you past recovering defenders while the elevated release point maintains shot quality. The risk is a narrower green window that demands consistent practice.
Floaters in the lane can set up pull-up threes on subsequent possessions, as defenders learn to respect your driving ability and close out harder on subsequent jump shot attempts. This psychological effect means investing in driving skills actually improves your three-point percentage indirectly by forcing defenders to honor the drive. Balancing driving and shooting threats is essential for becoming a complete offensive player.
Building Your Complete Shooter Build
Constructing an optimal shooting build requires balancing attributes, badges, and playstyle considerations against the meta preferences of the current game version. Different positions demand different attribute distributions, and understanding which ratings matter most for your intended role helps allocate upgrade points efficiently.
Point guards prioritizing shooting should focus on three-point attributes, ball handling, and passing to create their own shots and facilitate for teammates. Shooting guards can emphasize scoring attributes more heavily, with mid-range and three-point ratings taking priority. Small forwards and power forwards playing stretch roles need sufficient three-point ratings while maintaining enough strength and interior presence to contribute in other areas. Each position has viable shooting builds, but the attribute thresholds and badge requirements vary considerably.
Primary vs Secondary Scoring Options
Understanding your role within team compositions helps prioritize attribute allocation. Primary scoring options should max out three-point attributes and invest heavily in shooting badges, accepting lower ratings in other areas. Secondary options can distribute points more broadly, maintaining respectable shooting while developing playmaking or defensive capabilities that complement primary scorers.
The most successful teams feature clear hierarchies where everyone understands their responsibilities on each possession. When every player on a squad tries to be the primary option, ball movement suffers and easy shots disappear. Embracing a supporting role while still maintaining elite shooting attributes creates more wins than forcing a primary option mentality with mediocre shooting capabilities.
Frequently Asked Questions
What is the best way to practice shot timing in NBA 2K27?
The MyGym practice facility offers the most effective environment for developing consistent shot timing. Focus on 50-100 catch-and-shoot attempts daily with the shot meter enabled, tracking your green percentage to measure improvement. Community members recommend varying your distances and defensive pressure simulations by using the practice mode's different difficulty settings for defenders.
How do I get open for three-pointers against tight defense?
Off-ball movement is essential for creating separation against aggressive defenders. Use constant cuts, screens, and direction changes to exploit defensive positioning. Cutting toward the basket before reversing to the perimeter often creates multiple steps of separation, giving you the space needed for clean releases even against attentive defenders.
Which badges provide the biggest boost to three-point shooting?
Catch and Shoot provides the most impactful boost for off-ball three-point specialists, while Deadeye proves most valuable for players taking contested shots. Hot Zone Hunter rewards consistency from specific spots on the floor, making it ideal for players with developed shooting locations. Prioritizing these three badges before investing in other shooting abilities maximizes your early-game effectiveness.
Does jumpshot selection significantly affect three-point percentage?
Jumpshot selection impacts timing consistency and release speed, both of which affect three-point percentage substantially. Finding a jumpshot whose timing matches your natural reaction speed produces better results than forcing an animation that feels uncomfortable. Test multiple jumpshots in practice before committing, as the right choice varies significantly between players.
How can I improve my off-dribble three-point shooting?
Off-dribble three-pointers require narrower timing windows than catch-and-shoot attempts. Practice pull-up threes after drives using the shot meter to develop the adjusted timing these shots require. Building badge progression in Difficult Shots and Deadeye helps compensate for the inherent difficulty of off-dribble attempts, making these shots more reliable as your player develops.